Adventurous Kate contains affiliate links. If you make a purchase through these links, I will earn a commission at no extra cost to you. Thanks!
Anyone can start a travel blog — but starting a quality travel blog is a much more involved task. It involves time, it involves investment, and it involves a LOT of work.
Lots of people plan on starting a travel blog just to keep their family and friends updated on their travels. If that’s all you want, there’s nothing wrong with that! Go create a free WordPress.com blog.
BUT. If you want more people than just your friends and family to read your blog, if you want strangers to find your blog and thank you for it, and if you want the possibility of making money with your travel blog someday, this is how you want to go about starting it.
You’re ready. You’ve chosen a travel blog name, you have a few posts in mind, and you have some tantalizing travel plans on the horizon. Fantastic. Let’s put together your dream blog.
Step 1: Get Hosted
Don’t worry — hosting sounds scary, but it isn’t whatsoever! It’s just renting a little piece of the web for your site. So, which host should you choose?
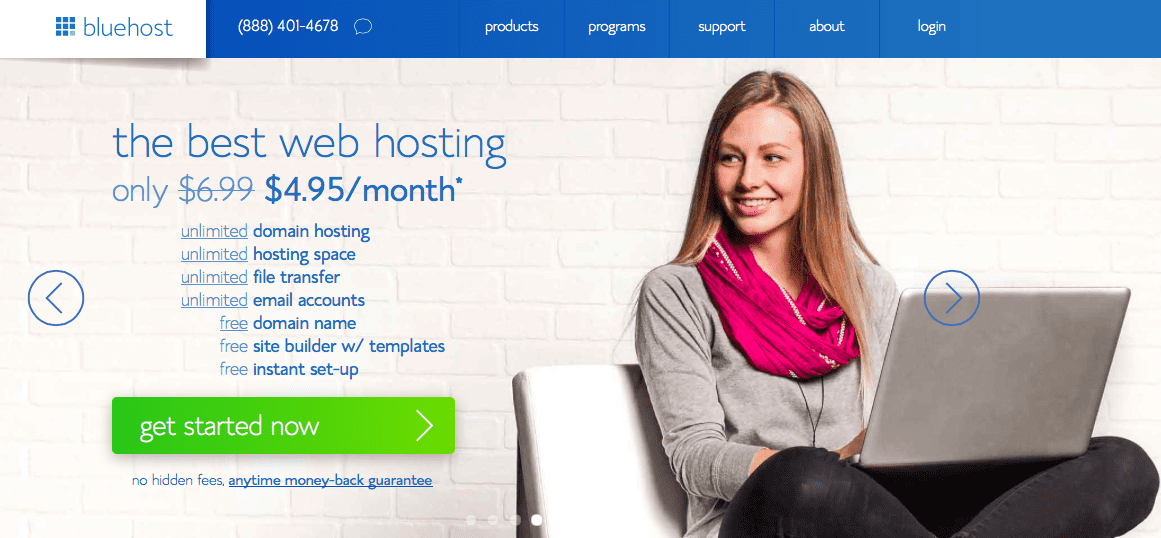
I recommend Bluehost for nearly everyone, new bloggers included. I use Bluehost for almost all of my sites because it offers quality hosting for a low price ($6.95 per month for 12 months) and I can always get through to them when something goes wrong. They give you your domain name for free, too!
From the front page, start by clicking the big Get Started Now button:
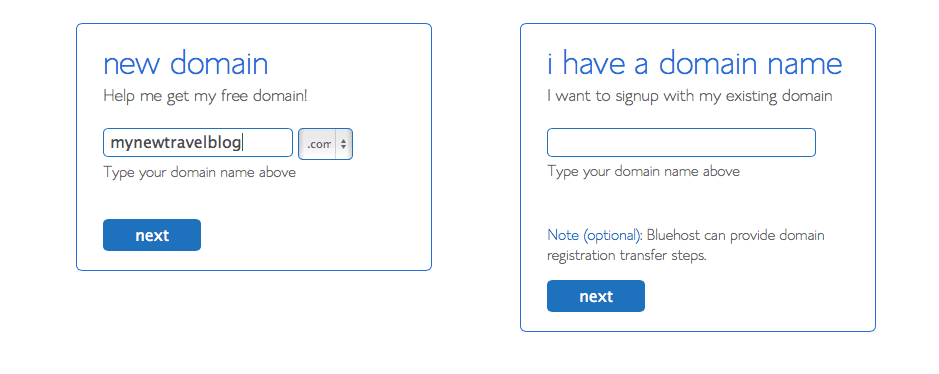
Next, choose the box on the left and put in your new domain name:
You’ll be taken to a page where you can decide on your package and some add-ons:
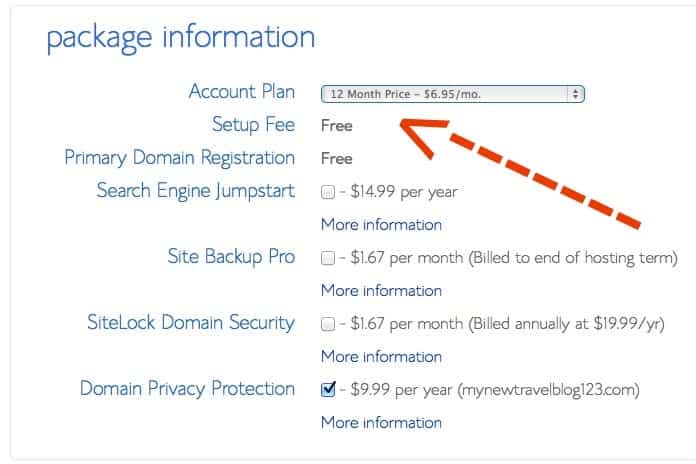
For your account plan, you can choose basic hosting plans for 12, 24, or 36 months. I recommend you go with the 12-month plan for $6.95 as anything can happen within a year and it’s just $1 more per month than the 24-month plan.
For the add-ons on the list, you don’t need Search Engine Jumpstart or SiteLock Domain Security. You can pay for the Site Backup Pro if you’d like, but I prefer to do the backing up myself. (I use the $80 plugin Backup Buddy).
Domain Privacy Protection, however, is something that you SHOULD spring the extra $9.99 for. Anyone can look up who owns any site; if you don’t pay for Domain Privacy Protection, anyone can see your name and mailing address on your site.
After your account is secured, it’s time to get WordPress up and running.
Step 2: Install WordPress
WordPress is one of the world’s largest publishing platforms. It’s immense, it’s easy, it’s used by multimillion-dollar publishers like CNN and People magazine, and nearly every blogger I know uses it, which means there are lots of professionals out there to help you out if anything goes wrong.
Bluehost offers easy one-click WordPress installation, which saves you from struggling through it or hiring someone to do it. On the cPanel, BlueHost’s home screen, you’ll see this button:
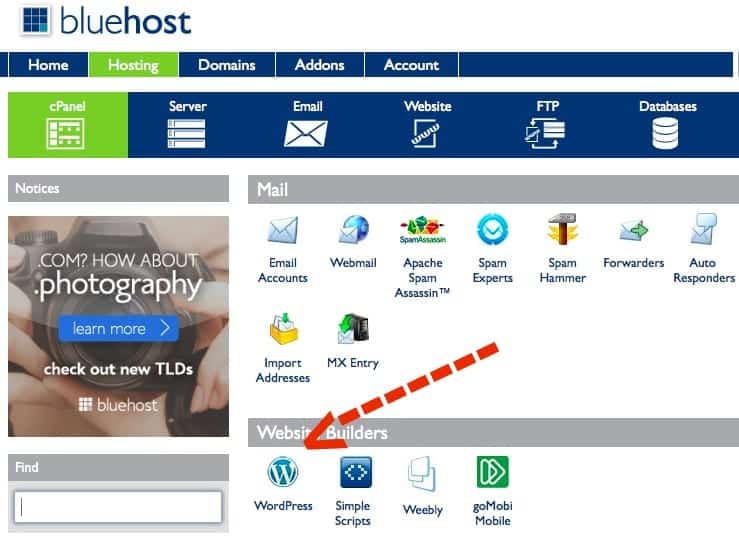
Click through and it will take you through a simple installation process. When it asks you where you’d like to install it, choose your domain (http://www.mynewtravelblog.com).
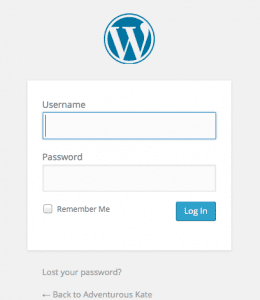
Once you install WordPress, it will tell you where to log in (usually www.mynewtravelblog.com/wp-admin) and your name and password. From that page, you’ll be able to log in to your WordPress dashboard:
Step 3: Install Plugins
Think of WordPress as a blank canvas — plugins are add-ons that make your travel blog functional. The vast majority are free; some free plugins ask for donations. Some premium plugins charge.
In the right side bar, click on where it says “plugins” and select “add new” to search plugins by keyword.
Here are the plugins that I recommend for new travel bloggers (and all of them are free!):
Akismet — Keeps spam under control (and yes, you will get LOTS of spam otherwise!)
Comment Reply Notification — Notifies commenters when they have a new reply to their comment. (It’s a courtesy thing.)
Contact Form 7 — Allows you to install a simple contact form so people can email you through your site.
Digg Digg — Displays social media icons on a floating sidebar, making it easy for people to share your posts.
Facebook Social Widgets — See that little Facebook widget on my right sidebar? That! Makes it easy for people to become your fan on Facebook.
FD Feedburner Plugin — Manages your feed, your stream of new content.
Google XML Sitemaps — Makes it easy for search engines to find your content.
nRelate — Puts little images of related posts at the bottom of each post, showing people more content they might like.
Photo Dropper — Helps you add Creative Commons photos to your site the easy way and cites them legally. You should use your own pictures whenever possible, but this is good when you don’t have pictures from certain destinations.
Ultimate Google Analytics — Installs Google Analytics, the industry standard of measuring your site’s visitors and traffic.
WordPress SEO by Yoast — Helps you create content that shows up better in search engines.
WPTouch Mobile Plugin — Makes your site look nice and easy to read on mobile phones.
Step 4: Secure Social Media Handles
Grab your desired screenname on each of the big ones — Twitter, Facebook, Instagram, Pinterest, and yes, Google+. Try to keep your name the same across all domains, except for Google+, which uses your full name.
Keep in mind that Facebook will not let you create a custom URL until you have 25 fans.
Step 5: Start an Email List
My first big blogging mistake was not starting an email list at first. When I finally did, I made my second big mistake — starting it on Mailchimp, a free provider. When it was time to switch to a premium service that gave me more options, I lost a huge portion of my email list in the process because you can’t just add all your names on a list — they need to confirm it yet again.
Today I use Aweber, the best email service out there, and I’m kicking myself because I wasn’t using it from the beginning.
Step 6: Join Travel Blog Success
Editor’s note: Travel Blog Success was purchased by a competitor in 2017 and is sadly no longer available for purchase.
Now What? Blog Prolifically and Be Patient
I always tell new bloggers to write at least four times a week to start. In your early days, blogging prolifically is the best thing you can do — because you’ll develop your voice, you’ll see what resonates with readers, and you’ll gain a greater understanding of what your blog should be.
Know that it’s not easy. It will take a long time and a tremendous amount of work before you gain a valuable audience interested in what you have to say on a regular basis. But once you do that, the perks in this field are OUTSTANDING.
Good luck, you fabulous travel blogger, you!
Note that affiliate links are used in this post. If you purchase any products recommended, I will receive a small commission at no extra cost to you. By purchasing items through my affiliate links, you’ll help reduce the ongoing expenses of running this site. Thanks! 🙂
